UbuntuにNginxをインストール&SSL/TLS設定
インストール
最新の安定版をインストールします。
sudo apt updatesudo apt install curl gnupg2 ca-certificates lsb-release ubuntu-keyring
# nginxの署名キーを追加curl https://nginx.org/keys/nginx_signing.key | gpg --dearmor | sudo tee /usr/share/keyrings/nginx-archive-keyring.gpg >/dev/null
# 安定版リポジトリの追加echo "deb [signed-by=/usr/share/keyrings/nginx-archive-keyring.gpg] http://nginx.org/packages/ubuntu `lsb_release -cs` nginx" | sudo tee /etc/apt/sources.list.d/nginx.list
# リポジトリの優先度設定echo -e "Package: *\nPin: origin nginx.org\nPin: release o=nginx\nPin-Priority: 900\n" | sudo tee /etc/apt/preferences.d/99nginx
sudo apt updatesudo apt install nginx
以下で実行します。
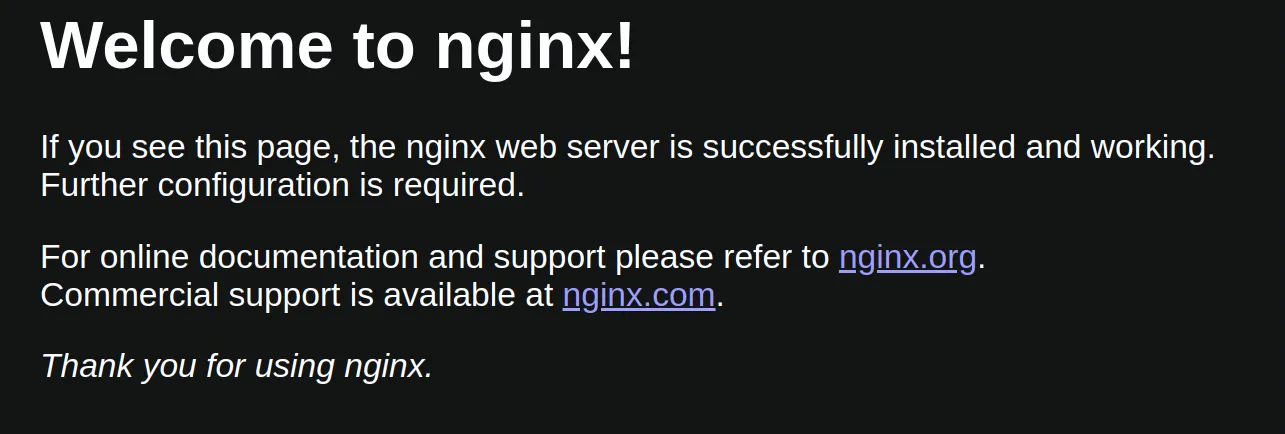
sudo systemctl start nginxサーバーの ip アドレス(http://xxx.xxx.xxx.xxx)にアクセスすると、以下のようなページが表示されます。

サービス登録
起動時に自動でサービスを起動するように設定します。
sudo systemctl enable nginxHTTPS 化
ここでは Let’s Encrypt の certbot を使用して SSL 証明書を取得します。
sudo apt updatesudo apt install certbot python3-certbot-nginxSSL 証明書を発行します。example.comの箇所は所有するドメインに置き換えてください。
sudo certbot certonly --nginx -d example.comプロンプトに従って証明書を発行します。プロンプトでは以下のような選択を行います。
- メールアドレス(通知用)
- 利用規約への同意
- Electronic Frontier Foundation(EFF)にメールアドレスを共有することへの同意。EFF のニュース、キャンペーンなどを受け取ることができる。
Saving debug log to /var/log/letsencrypt/letsencrypt.logEnter email address (used for urgent renewal and security notices) (Enter 'c' to cancel): your-email@example.com
- - - - - - - - - - - - - - - - - - - - - - - - - - - - - - - - - - - - - - - -Please read the Terms of Service athttps://letsencrypt.org/documents/LE-SA-v1.5-February-24-2025.pdf. You mustagree in order to register with the ACME server. Do you agree?- - - - - - - - - - - - - - - - - - - - - - - - - - - - - - - - - - - - - - - -(Y)es/(N)o: Y
- - - - - - - - - - - - - - - - - - - - - - - - - - - - - - - - - - - - - - - -Would you be willing, once your first certificate is successfully issued, toshare your email address with the Electronic Frontier Foundation, a foundingpartner of the Let's Encrypt project and the non-profit organization thatdevelops Certbot? We'd like to send you email about our work encrypting the web,EFF news, campaigns, and ways to support digital freedom.- - - - - - - - - - - - - - - - - - - - - - - - - - - - - - - - - - - - - - - -(Y)es/(N)o: YAccount registered.Requesting a certificate for example.com
Successfully received certificate.Certificate is saved at: /etc/letsencrypt/live/example.com/fullchain.pemKey is saved at:         /etc/letsencrypt/live/example.com/privkey.pemThis certificate expires on 2025-08-02.These files will be updated when the certificate renews.Certbot has set up a scheduled task to automatically renew this certificate in the background.
- - - - - - - - - - - - - - - - - - - - - - - - - - - - - - - - - - - - - - - -If you like Certbot, please consider supporting our work by: * Donating to ISRG / Let's Encrypt:   https://letsencrypt.org/donate * Donating to EFF:                    https://eff.org/donate-le- - - - - - - - - - - - - - - - - - - - - - - - - - - - - - - - - - - - - - - -
Nginx の設定
/etc/nginx/sites-available vs /etc/nginx/conf.d
上記の手法でインストールしたバージョンnginx/1.28.0は、デフォルトで/etc/nginx/conf.d/を参照する実装になっています。そのため、以下では/etc/nginx/sites-available/ではなく、/etc/nginx/conf.d/に設定ファイルを配置することにします。
一方、リポジトリを追加せずにインストールしたバージョンnginx/1.24.0では/etc/nginx/sites-available/を参照する実装になっていました。その場合は、/etc/nginx/sites-available/example.com.confを編集し、以下のようにシンボリックリンクします。
sudo ln -s /etc/nginx/sites-available/example.com.conf /etc/nginx/sites-enabled//etc/nginx/conf.d/example.com.confを編集します。注意する点としては、ドメイン(以下のexample.com)と、SSL 証明書のパスを正しいものに置き換える点です。
server {    listen 80;    server_name example.com;    # HTTP -> HTTPS リダイレクト    return 301 https://$host$request_uri;}
server {    listen 443 ssl;    http2 on;    server_name example.com;
    # SSL証明書の設定    ssl_certificate /etc/letsencrypt/live/example.com/fullchain.pem;    ssl_certificate_key /etc/letsencrypt/live/example.com/privkey.pem;
    # アプリケーションのルートディレクトリ    root /var/www/example.com;    index index.html index.htm;
    location / {        try_files $uri $uri/ =404;    }
    # Nginxバージョン情報を隠す    server_tokens off;
    # SSLプロトコルとセキュリティ設定    ssl_protocols TLSv1.2 TLSv1.3;    ssl_prefer_server_ciphers on;    ssl_ciphers 'ECDHE-ECDSA-AES256-GCM-SHA384:ECDHE-ECDSA-CHACHA20-POLY1305:ECDHE-ECDSA-AES128-GCM-SHA256';
    # OCSP Stapling    ssl_stapling on;    ssl_stapling_verify on;    resolver 1.1.1.1 1.0.0.1 valid=300s;    resolver_timeout 5s;    ssl_trusted_certificate /etc/letsencrypt/live/example.com/fullchain.pem;
    add_header Strict-Transport-Security "max-age=31536000; includeSubDomains" always;    add_header X-Frame-Options "deny" always;    add_header X-Content-Type-Options "nosniff" always;    add_header Content-Security-Policy "default-src 'self'; form-action 'self'; base-uri 'self'; object-src 'none'; frame-ancestors 'none'; upgrade-insecure-requests" always;    add_header X-Permitted-Cross-Domain-Policies "none" always;    add_header Referrer-Policy "no-referrer" always;    add_header Clear-Site-Data "\"cache\",\"cookies\",\"storage\"" always;    add_header Cross-Origin-Embedder-Policy "require-corp" always;    add_header Cross-Origin-Opener-Policy "same-origin" always;    add_header Cross-Origin-Resource-Policy "same-origin" always;    add_header Permissions-Policy "accelerometer=(), autoplay=(), camera=(), cross-origin-isolated=(), display-capture=(), encrypted-media=(), fullscreen=(), geolocation=(), gyroscope=(), keyboard-map=(), magnetometer=(), microphone=(), midi=(), payment=(), picture-in-picture=(), publickey-credentials-get=(), screen-wake-lock=(), sync-xhr=(self), usb=(), web-share=(), xr-spatial-tracking=(), clipboard-read=(), clipboard-write=(), gamepad=(), hid=(), idle-detection=(), interest-cohort=(), serial=(), unload=()" always;    add_header Cache-Control "no-store, max-age=0" always;}
ページ作成
sudo mkdir -p /var/www/example.comecho -n 'test' | sudo tee /var/www/example.com/index.htmlNginx の再起動
# 設定ファイルの構文チェックsudo nginx -t
# Nginxの再起動sudo systemctl reload nginxhttps://example.comにアクセスできるようになっており、また、http://example.comにアクセスすると、https://example.comにリダイレクトされるはずです。
テスト
SSL/TLS 設定をオンラインツールでテストできます。
- HTTP Observatory: https://developer.mozilla.org/en-US/observatory
- SSL Server Test: https://www.ssllabs.com/ssltest/
- Security Headers: https://securityheaders.com
- Hardenize: https://www.hardenize.com
- ImmuniWeb SSL Security Test: https://www.immuniweb.com/ssl
CLI
-
gixy(サーバー側で実行): https://github.com/yandex/gixy
Terminal window pip install gixygixy /etc/nginx/conf.d/example.com.conf -
Lynis(サーバー側で実行): https://cisofy.com/lynis/
Terminal window sudo apt updatesudo apt install lynislynis audit system -
testssl.sh(リモート): https://github.com/drwetter/testssl.sh
Terminal window docker run --rm -ti drwetter/testssl.sh https://example.com
IP アドレスでの直接アクセス制限
Nginx では、default_serverが定義されていない場合、受信したリクエストに対して単純に設定ファイル内で最初に見つかったサーバーブロックを適用します。
この動作はセキュリティリスクとなり得るため、未知のホスト名へのリクエストに対しては、Nginx 特有の444ステータスコード(応答なし)を返すことで接続を即座に切断し、不正アクセスやホストヘッダ攻撃からサーバーを保護します。
デフォルトサーバーブロックの設定
/etc/nginx/conf.d/default.confを編集します。
server {    listen 80 default_server;    listen [::]:80 default_server;    server_name _;
    # 単純に接続を閉じる    return 444;}
# HTTPSserver {    listen 443 ssl default_server;    listen [::]:443 ssl default_server;    http2 on;    server_name _;
    # 最小限の設定    ssl_certificate /etc/nginx/ssl/self-signed.crt;    ssl_certificate_key /etc/nginx/ssl/self-signed.key;
    return 444;}
自己署名証明書の生成
sudo mkdir -p /etc/nginx/sslsudo openssl req -x509 -nodes -days 365 -newkey rsa:2048 -keyout /etc/nginx/ssl/self-signed.key -out /etc/nginx/ssl/self-signed.crt設定を反映します。
# 設定ファイルのテストsudo nginx -t
# Nginxの再起動sudo systemctl reload nginx
IP アドレス(http://xxx.xxx.xxx.xxx)でアクセスすると、接続がブロックされるようになったと思います。